## 入门必须配置,以下配置一步都能少!!!
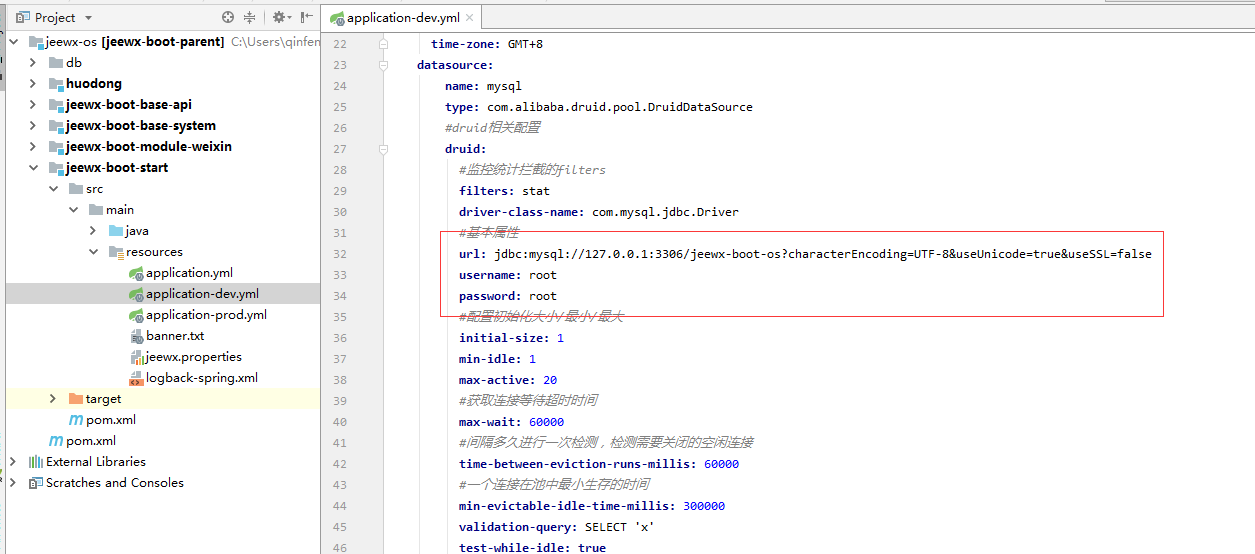
* 1.配置数据库
```
jeewx-boot-start\src\main\resources\application-dev.yml
```
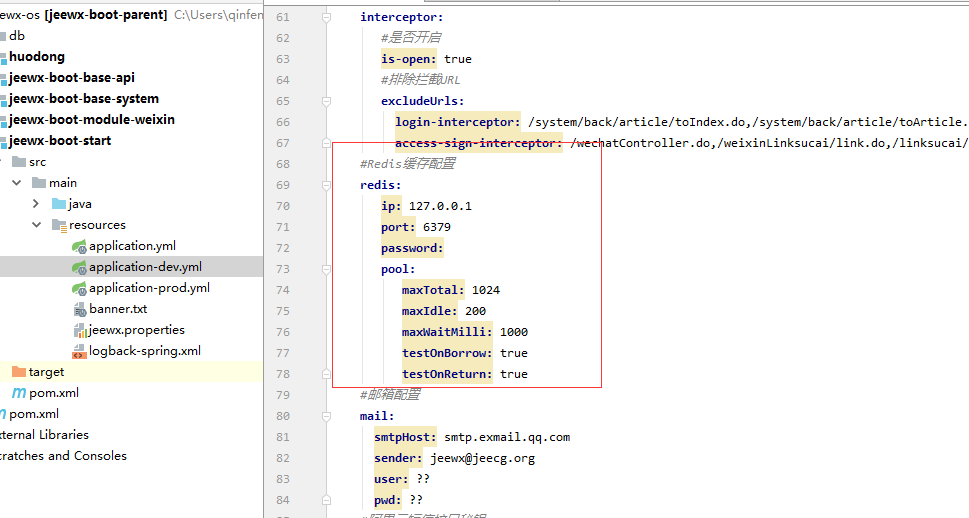
* 2.配置redis
```
jeewx-boot-start\src\main\resources\application-dev.yml
```
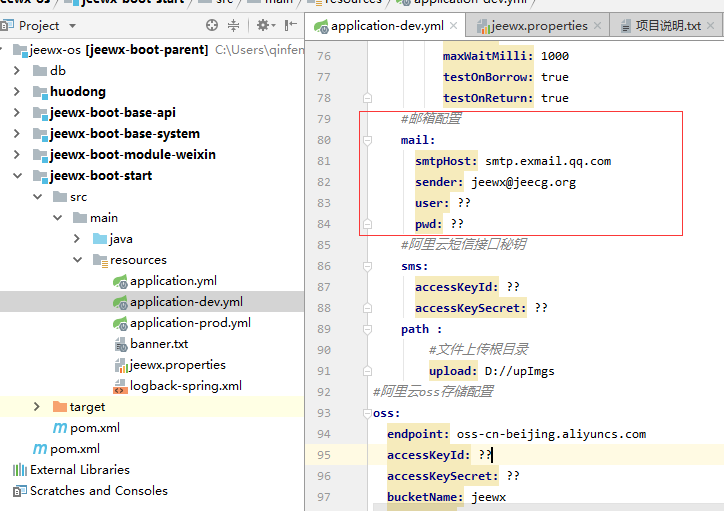
* 3.配置阿里云存储账号
(必须配置,系统所有图片上传都采用云存储)
[阿里云账号申请方法](https://blog.csdn.net/legend12300/article/details/51130877)
```
jeewx-boot-start\src\main\resources\application-dev.yml
```
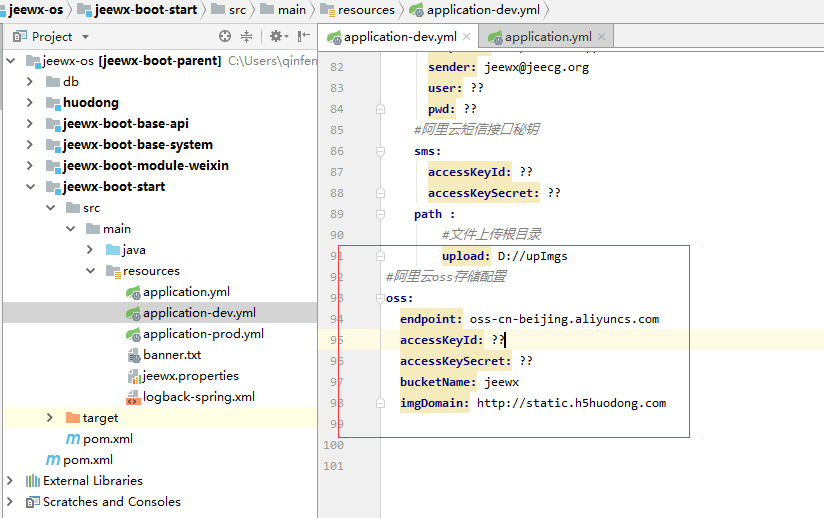
#### 参数说明
| 参数 | 说明 |
| --- | --- |
| endpoint | 阿里云账号的 |
| accessKeyId | 账号的accessKeyId |
| accessKeySecret | 账号的accessKeySecret |
| bucketName | 阿里云bucketName名字 |
| imgDomain | 阿里云用户绑定域名 |
* endpoin和 bucketName获取

* 域名截图

* accessKeyId和accessKeySecret 获取

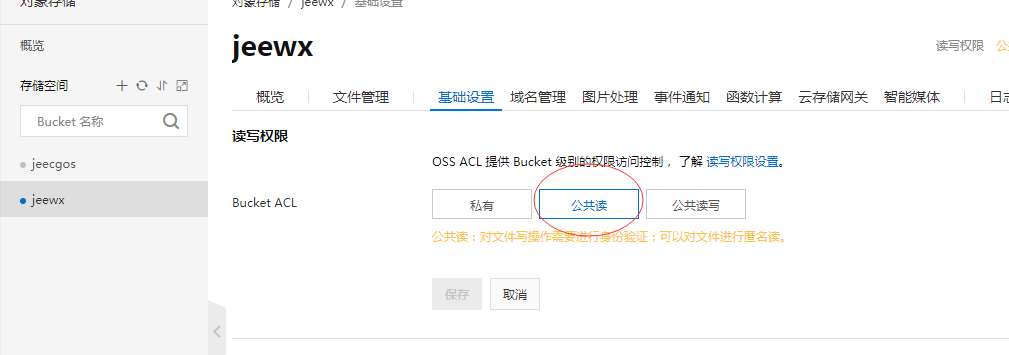
* 设置为公共读
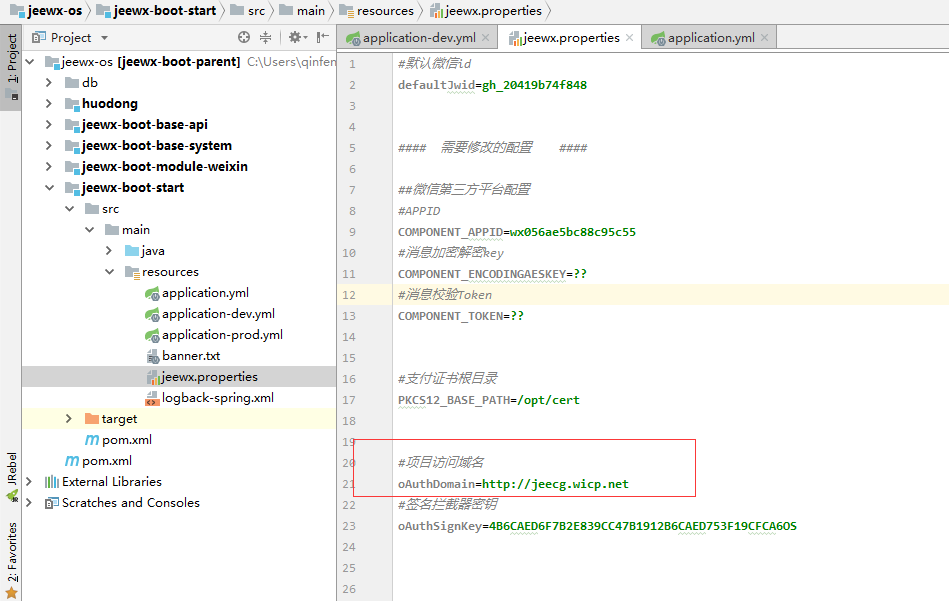
* 4.配置访问域名
```
jeewx-boot-start\src\main\resources\jeewx.properties
```
* 5.执行数据库脚步
```
要求 mysql5.7+
通过 db/schema_mysql5.7.sql 创建数据库;
通过 db/jeewx-boot-mysql5.7.sql 初始化数据;
```
* 6.Maven私服配置
找到 maven老家 conf/settings.xml
在<mirrors>标签内增加下面方式的阿里云maven镜像(删除自己的镜像配置), 最终结果见下面:
```
<mirrors>
<mirror>
<id>nexus-aliyun</id>
<mirrorOf>*,!jeecg,!jeecg-snapshots</mirrorOf>
<name>Nexus aliyun</name>
<url>http://maven.aliyun.com/nexus/content/groups/public</url>
</mirror>
</mirrors>
```
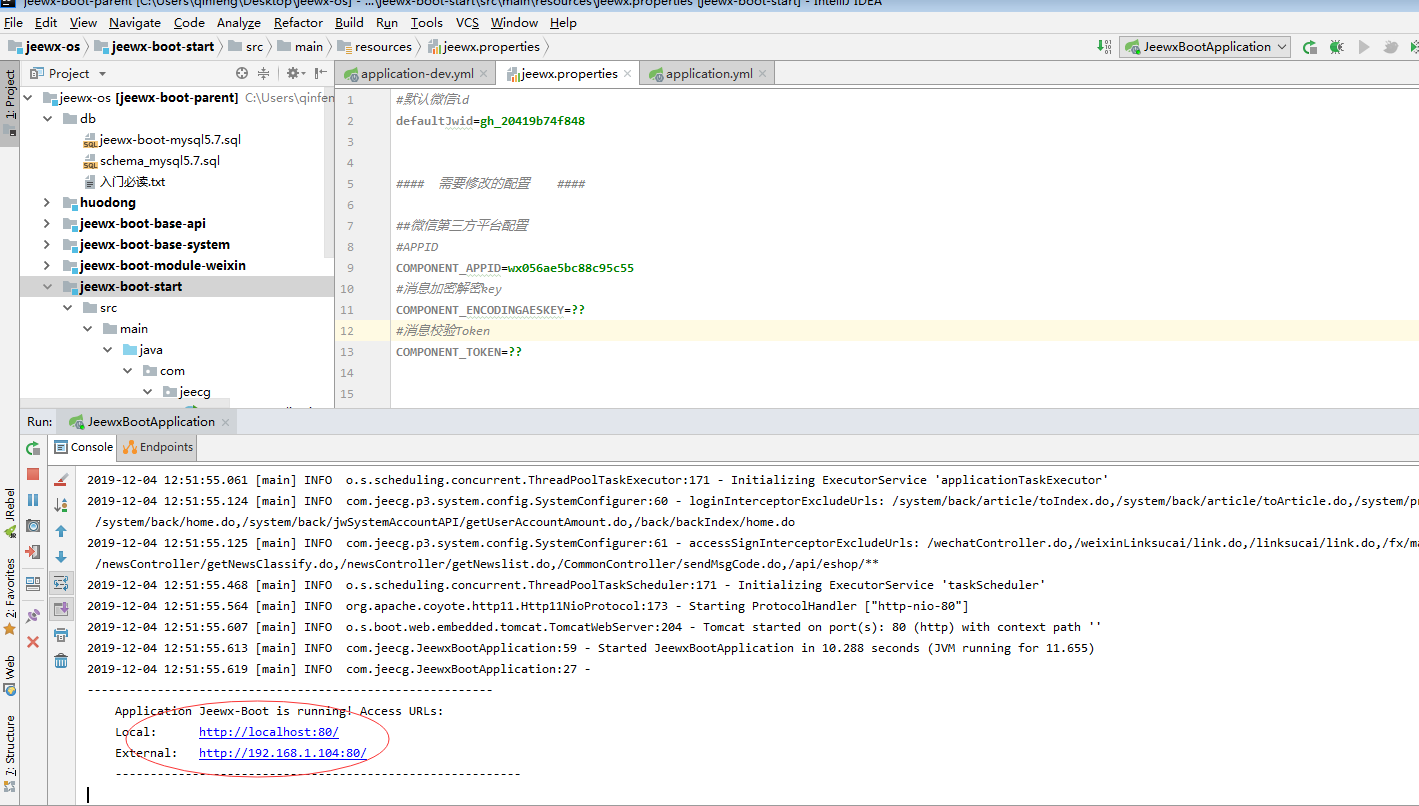
* 7.启动项目
```
项目采用SpringBoot架构;
右键执行JAVA类: jeewx-boot-start/com.jeecg.JeewxBootApplication
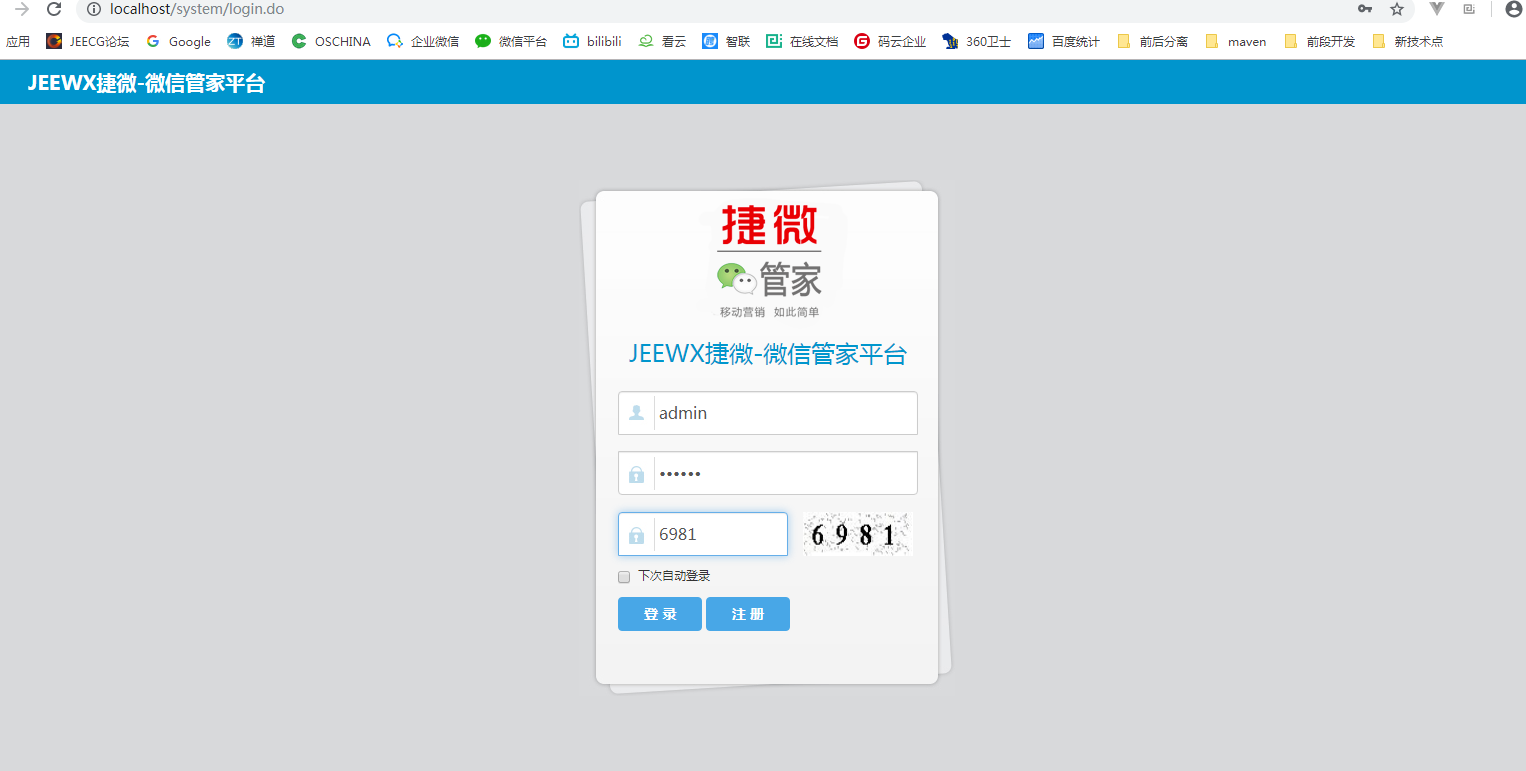
启动成功后访问: http://localhost:80 (admin\123456)
```

## 其他配置(可以不用的功能)
* 8.短信接口配置(采用的阿里大鱼短信)
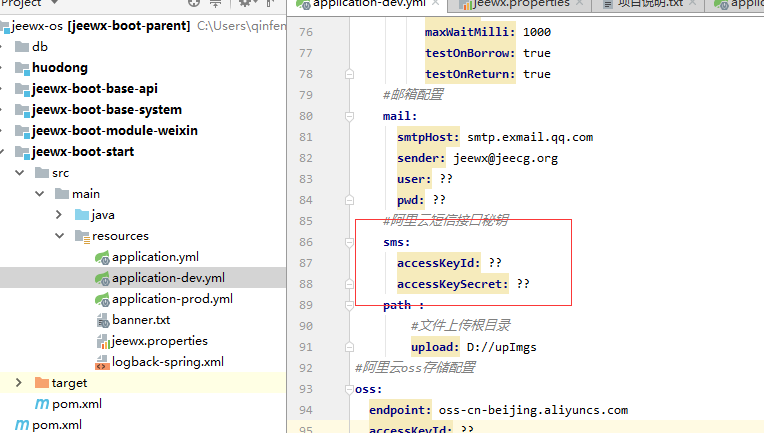
* 9.邮件配置(系统注册等通知)
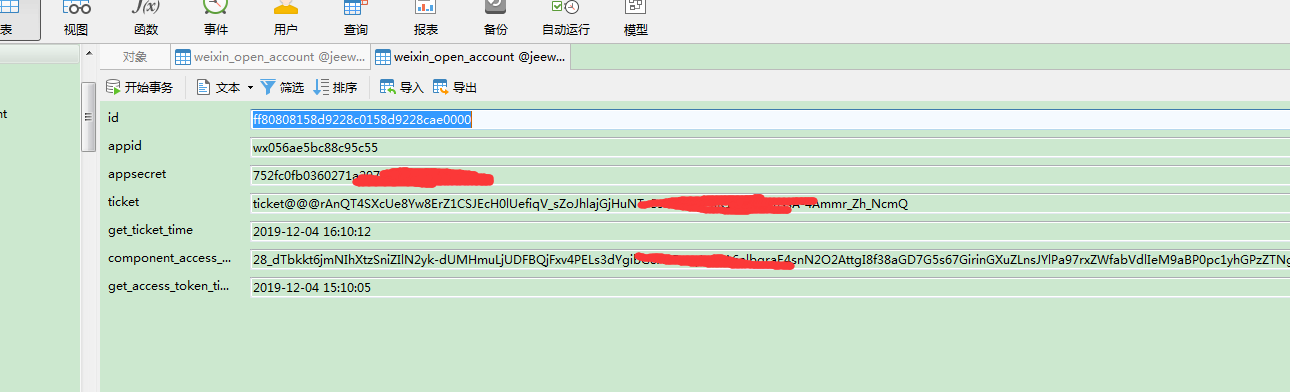
* 10.微信第三方平台配置(扫描授权公众号需要)
第一步:配置文件修改

第二步:手工往数据库【weixin_open_account】,插入一条第三放平台配置数据
- 项目介绍
- 入门教程资源文档
- 商业支持
- 开发环境搭建
- 入门必读
- IDEA开发环境搭建
- Eclipse开发环境搭建
- Maven私服配置
- 快速新建模块项目
- 平台配置文件
- 排除拦截注解
- 配置文件(数据库_redis_拦截器)
- 线上发布
- JAR部署方案
- 微信公众号对接
- 微信公众号与平台对接
- 微信Oauth域名对接
- 微信本地如何调试
- 活动插件集成
- 插件集成方法
- 活动插件调试
- 小程序CMS模块
- 小程序CMS后端集成测试
- 小程序CMS前端代码运行测试
- 小程序CMS官方发布测试
- 短信和模板
- 大鱼短信
- 微信模板
- 文档快速集成
- 【视频大纲】Jeewx入门开发培训
- 开发入门系列教程
- Jeewx-Boot项目介绍
- 公众号上行对接
- 公众号下行对接
- 公众号对接
- 小程序官网对接(WEB工具测试_发布测试)
- 小程序官网开发环境搭建
- 微信官网后台搭建
- 本地开发实现热部署(IDE+jrebel)
- 砸金蛋oauth域名测试
- 砸金蛋活动集成
- 活动开发入门系列教程
- 1.下载活动模板
- 2.模板集成
- 3,Auth授权获取用户信息
- 4.实现分享
- 5.文本配置
- 6.活动配置
- 小程序开发指南
- 小程序wepy开发
- 小程序技术文档
- 小程序开发环境搭建
- 常见问题
- wepy 常用命令
- wepy实战源码示例
- 小程序培训大纲
- WebStorm开发工具设置
- 小程序项目发布
- 捷微小程序CMS发布
- 捷微小程序商城发布
- Eshop小程序发布配置
- 微信web开发调试
- 小程序部署
- 快速配置
- 上线配置
- uni-app开发一休面试
- uniapp工具安装配置
- uniapp项目环境搭建与运行
- 项目发布测试